Return to ➽ ➽ Helpful Info
Simple Instructions for taking a Screenshot on your Computer!
Please choose a tab below to see detailed instructions

IMPORTANT!!
Save the Screenshot to Desktop
So you can find it easily!
Using Snipping Tool:
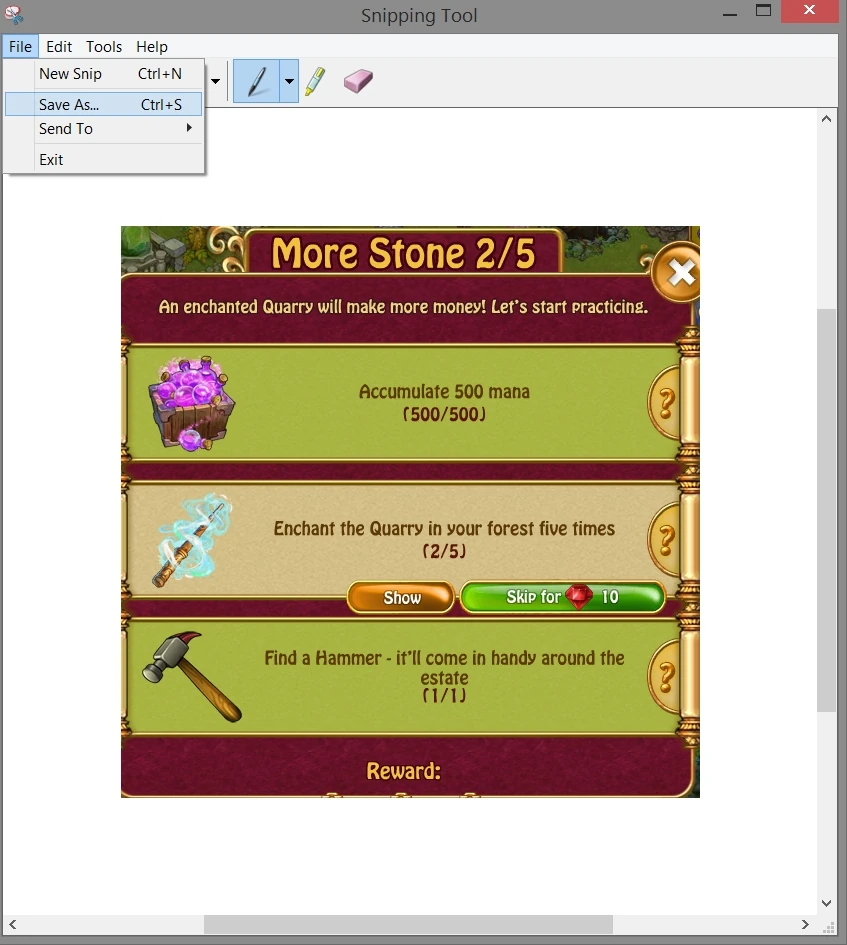
- Now that you've opened Snipping Tool, click on the Arrow next to "New" until you see the drop down menu. Choose "Rectangular Snip"
- Select the area of the screen you want to capture, click somewhere on the picture, and while holding the left mouse button, drag a rectangular box around the area you want to create a snapshot of.
- Once the selection is made, release the left mouse button and the rectangular region will now be shown in a small window where you can save it as an image.
- Save the new image to desktop or somewhere you can easily find it to upload onto facebook or use the copy option under Edit on the menu.
- Upload onto Facebook by clicking the "camera" button and choosing the new screenshot.

Win 7 Users:
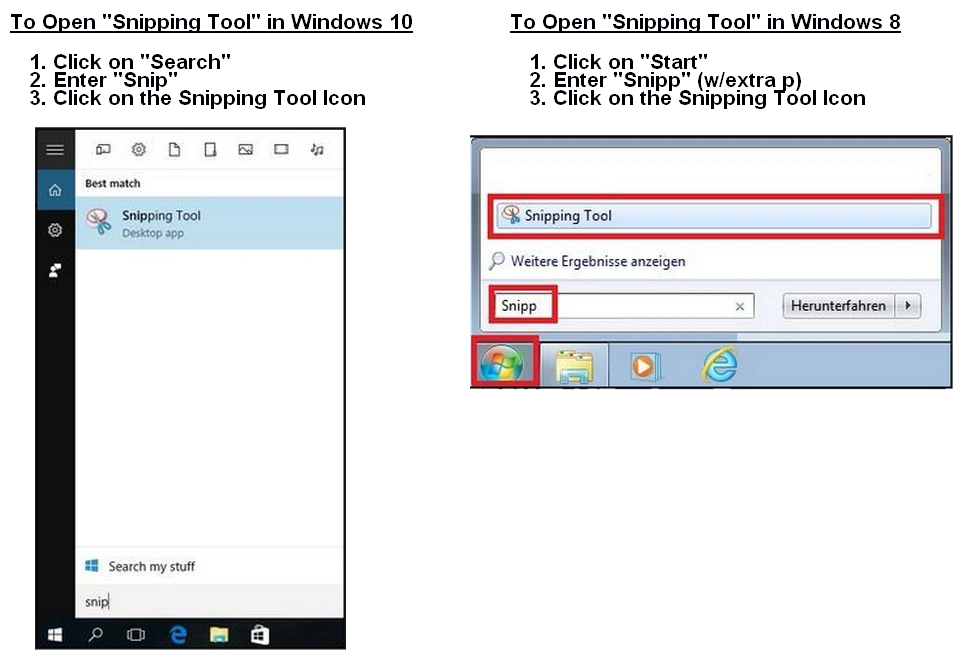
- Click on the "start" button and type "Snipping Tool" into the search bar at the bottom. (See pic)
The Snipping Tool should show in the list - click to open.
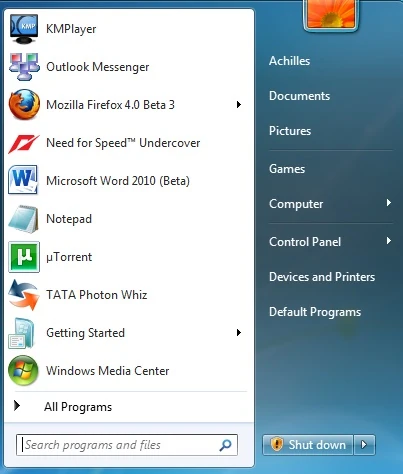
Win 7 Start Menu
Using Snipping Tool:
- Now that you've opened Snipping Tool, click on the Arrow next to "New" until you see the drop down menu. Choose "Rectangular Snip"


- Select the area of the screen you want to capture, click somewhere on the picture, and while holding the left mouse button, drag a rectangular box around the area you want to create a snapshot of.
- Once the selection is made, release the left mouse button and the rectangular region will now be shown in a small window where you can save it as an image.
- Save the new image to desktop or somewhere you can easily find it to upload onto facebook or use the copy option under Edit on the menu.

- Upload onto Facebook by clicking the "camera" button and choosing the new screenshot.
Mac Users:
- You can capture your entire screen or just a selected portion of it. The screenshot is automatically saved to your desktop.
How to take a screenshot of your entire screen
- Press Shift-Command (⌘)-3.
- Find the screenshot as a .png file on your desktop.
How to take a screenshot of a selected portion of your screen
1. Press Shift-Command-4. The pointer changes to a crosshair.
2. Move the crosshair to where you want to start the screenshot, then drag to select an area.
3. When you've selected the area you want, release your mouse or trackpad button. To cancel, press the Esc (Escape) key before you release the button.
4. Find the screenshot as a .png file on your desktop.
For more instructions:
https://support.apple.com/en-us/HT201361


Para fazer um "Print", que é uma foto da sua tela com ótima qualidade, vocês podem apertar a tecla "Print Screen" ou "PrtScr", que costuma ficar no canto superior direito do teclado. Em alguns notebooks é necessário segurar a tecla Fn (que fica pelo canto inferior esquerdo) enquanto aperta a tecla PrtScr.
Depois vocês podem colar a imagem inteira onde quiserem enviá-la, ou abrir o pograma Paint para colar e recortar da forma que achar melhor. Salvem esta imagem do Paint e enviem-na nos comentários.

